Step 4: Export Options
Using the EMG Tools Export Options Panel
- 1
Select What to Export
EMG Tools can export normalized data, downsampled data, and produce figures of each processed trial.
- 2
Run the Program
The Run button will bring up a window that will prompt you to select all of the data files to process.
- 3
Choose Where to Save Processed Files
Once EMG Tools has finished processing the data files, you will be prompted to select a location on your computer to save the files containing the processed data.
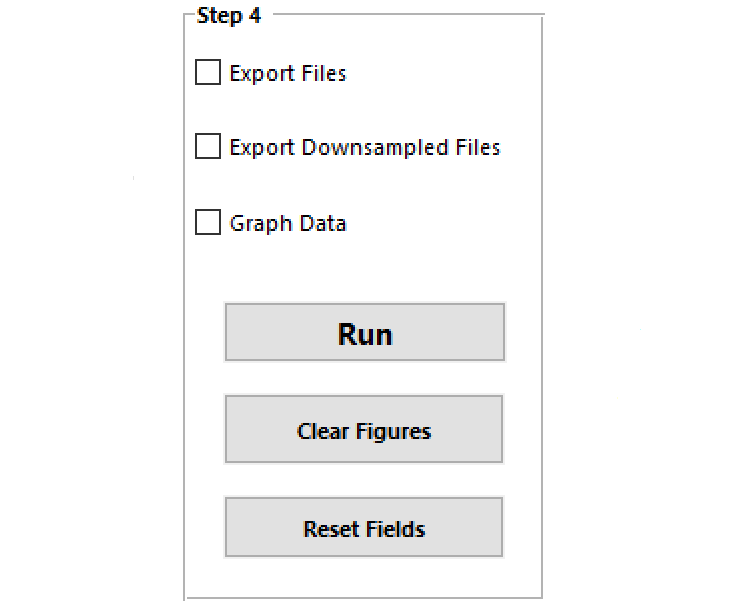
Export files.

Checking this box will prompt the program to export the processed data in .csv format.
Export downsampled files.

Check this box to export downsampled processed data in .csv format. If both file export options have been selected, downsampled files will be created alongside the fully-sampled processed files.
Graph data.

Checking this box will produce quick time-series graphs of each processed data file. Pressing the Clear Figures button will delete them when you are finished.
Run the program.

Pressing this button will bring up a file selection window. From here, select all of the data files to process. Once processing is complete, a window will pop up and prompt you to select a location to save the processed data files.
Clear figures.

If you have selected to produce figures containing time-series data of the processed data, this button will clear them once you are finished looking at them.
Reset fields.

This button will reset everything in the program to default values.