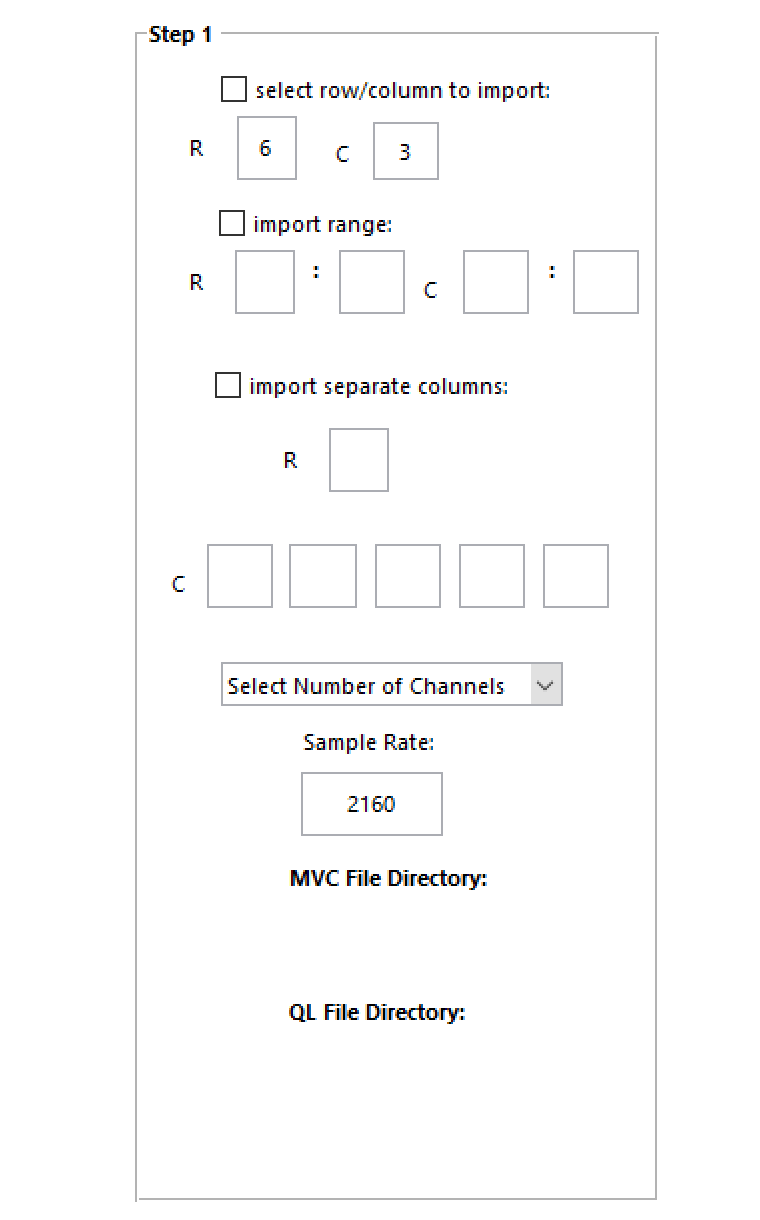
Step 1: Data Import
Using the EMG Tools Data Import Panel
- 1
Select Import Option
EMG Tools can import raw data at a set row/column, a range of rows/columns, or up to 5 separate columns.
Note
- Rows and columns start counting from 1 NOT 0.
- Row and column ranges are INCLUSIVE (starts importing at row and column specified).
- 2
Select Number of Channels
Use the drop-down menu to select the number of EMG channels you would like to process.
- 3
Enter Sample Rate
Enter the rate your raw EMG data was sampled at.
Normal import option.

The normal import option starts importing all of the data to the right of the row specified and below the column specified.
Range import option.

The range import option allows for the selection of a range of rows and columns (inclusive) to import from.
Note
MVC and Quiet Lying files are still imported using the normal import style so maximum values are not skipped over.
Separate column import option.

The separate column import option allows for the import of anywhere from 1 to 5 separate columns of data.
Note
Ensure that column values are progressively filled starting from the leftmost box and that they are entered in ascending order.
Select number of channels to process.
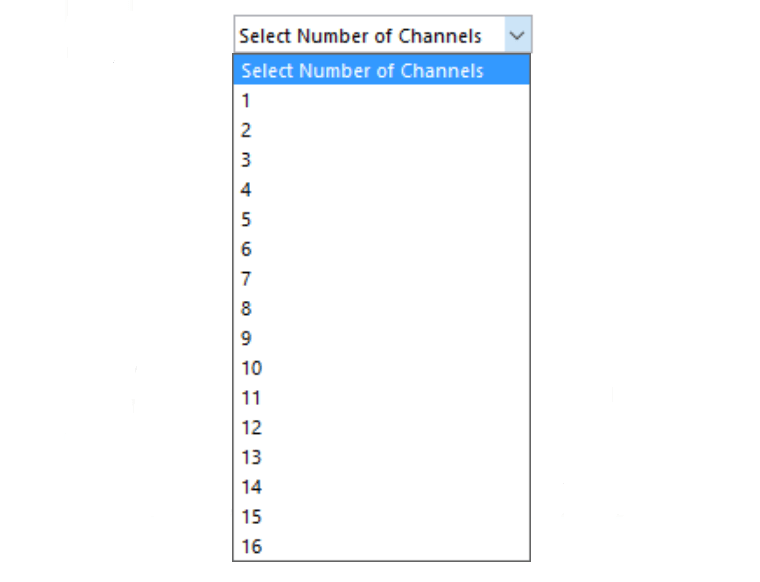
The number of channels of EMG to process can be any number between 1 and 16. Selecting a number from this menu will populate the listboxes in Step 2 with channel numbers.
Note
Be sure to normalize your data accordingly, if you were to import for example, only EMG channels 7 and 8 from your raw file, they would be classified as channels 1 and 2 within EMG Tools.
Directory label.

This indicates the directory the MVC and Quiet lying files are being imported from. Labels will also be color-coded for comparison with the filenames that appear in the channel selection feedback window.